Now it’s time to set up links between the rooms as we planned in Step 2, Design the game map.
For doing this, we have to add a LINKS section. According to the DXW game format (consult the Developers’ Reference for more details) the LINKS section should contain one LINK tag for each link you want to set up.
For the moment, just copy+paste the code which you find below in bold. Place the code in your testland.dxw file, after the END_ROOMS but before the END_WORLD tag.
END_ROOMS
LINKS
LINK w1 park-bungalow N
LINK w2 bungalow-bedroom N
ICON icoDoor.gif
NAME a door
END_LINKS
END_WORLD
We just added the two bi-directional links we have drawn in the map, one of them is actually a door.
Save your game file before continuing!
Add graphics
Remember the grabbing graphics exercise? You have to grab the door icon below and save it in your game’s pictures folder (named testland).
 (right-click, Save image as…)
Please do so now, otherwise the door icon won’t be shown in your game.
Another test round – reloading the game
Now we will see how to reload the game quickly after an update.
Copy-paste this URL into your browser:
http://localhost:8080/dimx/servlet/multiplayer?game=1&view=admin
Note: This URL may change from installation to installation, however you simply add “&view=admin” to the game’s URL.
After doing so the Admin page should appear:
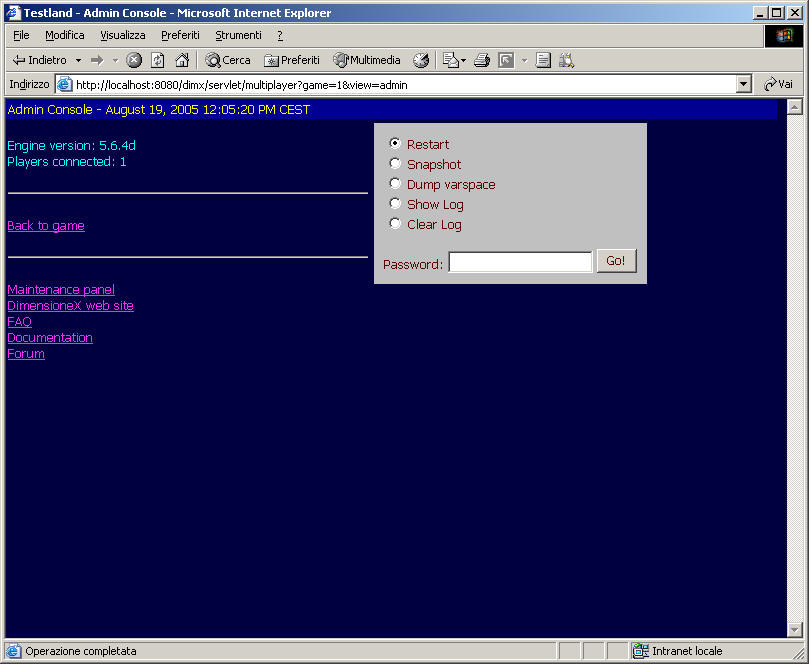
Here, normally you enter the admin password, verify that “Restart” is selected and the click the “Go!” button.
Tip: The Admin page, also, should be in your favorites or – even better – your link bar.
Note: In the typical installation the admin password is not set so you normally would click Go without entering anything. If yours is an online server then you should read in the Readme file how to set an admin password.
As the game is restarted you will be shown the logon page, again. Now you are able to navigate between rooms in the game.
Nice huh? Stop a while and think.
- You just did 4 steps, and spent a just few minutes.
- This is already a multiplayer environment. If you follow instructions in the Readme file, you will see you can invite friends in it and chat with them in it.
- You didn’t write a single line of programming code. You used a simple text-based language which simply describes the game environment. You can develop a complete reconstruction of your home, your garden, your favourite pub this way, and very quickly.
However, our aim here is to develop a game.
Now, if you didn’t do that yet, it’s time to get creative juices flowing and invent a plot for our game. We will do this in the next step. If you have time, look at the notes and tips below, otherwise jump forward.
When ready, let’s proceed with the next step.