![]()

|
|
|
|
Customizing the players' characterKB Article n. 014 AbstractThis article explains how to add a class selection (player customisation) screen to a game, for building true, role-playing games. Our exampleThe technique illustrated in this article is based on DimensioneX's built-in support for custom graphic buttons. This method was used for the demo game Underworld. This is an Open-Source, fantasy RPG game: at the beginning you have the possibility to customise your game character and, definitely, to choose your role. In particular, you can choose a combination of role (good or evil) capabilities (experienced in fighting, magic or crafting) and gender. Based on this choice, your abilities will be determined. It is strongly advised that you play Underworld at least once so that you understand what the player customisation is all about. Target behaviourSuppose the desired behaviour is that, after logging in the game, the new player is presented the player type choice. Then, after that choice, the real game begins. The game shall then behave differently depending on the player's chosen type. How to implement itThe target behaviour is easily obtained with these three schematic steps:
At the beginning, available character types will be displayed as graphic buttons, in the control panel which is usually used to hold game commands. As soon as the player proceeds, the player's currently selected choice is recorded, his player properties are changed accordingly, and the avatar is brought in the true game's starting room. Just follow this step-by-step tutorial to learn how to apply to some game of yours the initial player choice. After you're finished, you will be able to easily modify the example to suit your needs. Step 0 - get testlandThis tutorial is based on the basic
tutorial for DimensioneX. So, to proceed you should get the little demo game
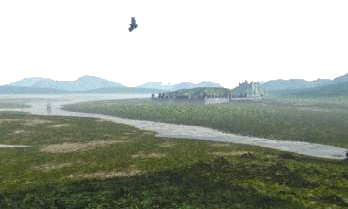
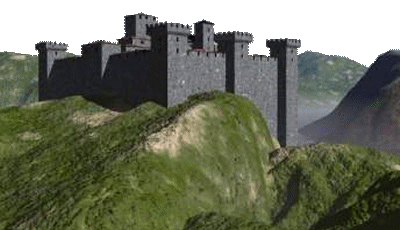
Testand. Step 1 - add introductory roomsWe will add now a couple of extra, introductory rooms to our game. We searched the Elfwood database (see Resources link aside) and found two suitable images:
The first room will be just an introduction, and makes the user to get comfortable with the arrow-shaped movement controls. The second one will contain the player type choice and eventually starts the real game. Here are the two rooms definitions to be added in the ROOMS section of your games' DXW file:
The first room is defined as DEFAULT so that the player will start here his adventure. Please remove the DEFAULT attribute from the original starting room of our game (In Testland, this was room whose identifier is park). Make sure the DEFAULT attribute appears only in the definition of room pre1. Note: When pasting the above code, make sure the text for DESCRIPTION stays on a single line: line spawning is not allowed. Right-click on the images above and with the "Save image as..." command be sure to save them in your game's images folder (for Testland, this folder is dimx/testland) Now, before proceeding, save and test. You should be able to enter room pre1, but you can't continue since we did not establish links from pre1 to pre2. Step 2 - add linksWe now add in the LINKS section, the necessary link from room pre1 to pre2, and another from pre2 to the real, starting room of the game, whose id is park:
This little lets you pass from pre1 to pre2, and then to start the game by using the North arrow. Save and test. You can download here the source of the tutorial at this point (images are excluded): testland_rpg_s2.zip. Step 3 - choices as graphic buttonsSince DimensioneX allows custom commands, we can define a custom control panel to let the player choose its character class. We do so by adding a GUI section on top, before the ROOMS section, like this:
(If your own game already has a GUI section, just paste the PANEL definition inside) The above defines the custom panel. Please note also how I used the LABEL tag to insert plain HTML code to the panel. Use this tip at your liking later. Now, to make this panel to automatically appear on room pre2, we need to slightly update pre2's definition by adding the PANEL attribute, like this:
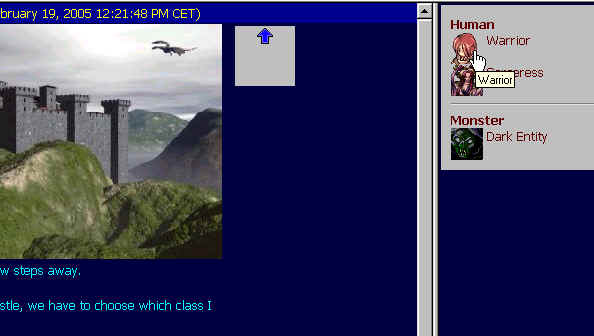
Before testing yu need to add the icons for three graphic buttons. Download them into your images folder (right-click, save image as...): Now save and test.
Please note that the chosen panel appears, but the game engine still needs to be instructed about what to do upon player's choice. Now we just have to add some code to properly manage the choosing events. Step 4 - Player settings managementNow it would be a good idea to place in the pre2 room a template character, so that the player could preview how he or she will look like by accepting the current choice. So, let's add an extra character to the CHARACTERS section, like this:
Now, the code for handling the choices. You will remember that we defined each button so that a
specific event was triggered when you click on them. We now exploit those
events, like this (add to the EVENTS section)
Please note how all the choice events will eventually call the same subroutine named updTemplate to update the sample avatar on the screen. This way, each choice will change both the current player's properties (the player is represented by the $AGENT system variable according to the DimensioneX event model) and the template character you see on the screen. Before testing yu need to add the icons for three graphic buttons. Download them into your images folder (right-click, save image as...):
Now save and test. You should be able to see the template character to change look when you click on the choice icons. clicking on the sample avatar will show its properties. Now, some little hints for later.
You can download here the source of the tutorial at this point (images are excluded): testland_rpg_s4.zip. Step 5 - Accept choiceWhen the player proceeds from room pre2, he accepts his choice. Then, the game engine can consider the choice as made when the onExit event associated to the pre2 room is fired. Here is the necessary SmallBasic code (to be added in the EVENTS section):
The code doesn't do very much, actually. It says that, when the player exits room pre2 (EVENT pre2.onLoose) via link p1 (If $TARGET = p1) in the case the player did not click any of the special controls to select the class (If $AGENT.type still equals to zero), then the entrance to game's starting room is cancelled (Return false). Save and test the game. You can download here the source of the tutorial at this point (images are excluded): testland_rpg_s5.zip. Step 6 - Taking into account the player type in the gameLook at the above script, EVENT pre2.onLoose. consider the following snippet of code:
According to the onLoose event model (check the Developer's Reference), $AGENT represents the player moving from one room to another. Now, by checking $AGENT.type (that is, the player's type) we will know if he's a human (type < 10) or a monster (type > 10) and act accordingly by displaying the proper sentence. You can take decisions like this throughout all the game. Consider this example in which, the character surfer speaks a different phrase according to the player's role and gender: The action is triggered by clicking on (looking at) the surfer.
You can download here the source of our finished tutorial (images are excluded): testland_rpg.zip. Final considerationsWe have seen how a player customisation screen can be added to any game. Then, the player look and properties will change according to the user's choice and the game engine can correctly ditinguish player classes and act accordingly. You will notice that all player classes in this example share the same commands, i.e. they can do the same things. It is usually a good idea to define different control panels for different player classes and set them up upon entrance in the game. For example, both warriors and monsters could have the ATTACK command, while magicians could have CAST SPELL, and COMBINE ELEMENTS. Monsters could have a YELL command to scare other players with animal sounds. How to achieve this goes beyond the scope of this tutorial, but in pre2.onLoose we gave you some code that just needs to be un-commented to work. In the case you want to experiment, don't forget to define the class-specific panels. Below you have an example:
It is now left to you to implement the events: onAttack, onCastSpell, onCombine and onYell by using some code in the EVENTS section. These events should take into account the nature of the player. You can get inspiration from the source code of Underworld (http://www.dimensionex.net/underworld/ ). Feel free to contact us or post on the forums for giving feedback or asking for further advice. Send us your workWe are looking forward to receive new games to be put online. Submit your work to us, and you will contribute to the DimensioneX project. Full credit is given to contributors, and their games will be published on the game portal: www.gamesclan.it and on this web site. |