![]()

|
|
|
|
Defining and using custom panels
|
| Roll the dice! | Used as a stand-alone command (i.e. needs no more parameters), would be used to produce a random number from 1 to 6 and display it on the screen of all players in the game. This command will be used for using DimensioneX as an on-line platform to play RPG games the ordinary way. |
| Attack #1 | Used with one parameter, specifies that the player wants to attack another character. The character to be attacked (#1) will be selected after the command. |
| Cut #1 with #2 | Used with two parameters, specifies that the player wants to cut object #1 with object #2. The two objects will be selected after the command. |
| Magic formula "XYZ" | Pronounces a magic formula (XYZ) to be specified in a textbox. Some specific magic formulas will produce effects, others will not. |
The four examples above represent all possible combination of parameters so it is important that you follow all this tutorial.
You start by taking a sample game on which to take the next
steps.
Please open with your favourite text editor the world2.dxw file you will find in
your DimensioneX package. Perhaps you will want to work on a copy of it, so that
you keep the original one for other, later experiments.
Please remember that when testing your work, in order to let DimensioneX engine to run this file, you will have to edit the worldnav.properties file and change the worldFile setting accordingly.
Now, the first question one should ask himself is the following:
Am I willing to:
a) redefine the standard, default commands panel? or
b) use the custom commands only in selected rooms/situations?
For this tutorial we will suppose here that we are in case a).
Case b), though, can also be easily managed after understanding this tutorial. Just read the information contained in the Programmers' Reference, which you should always keep at hand.
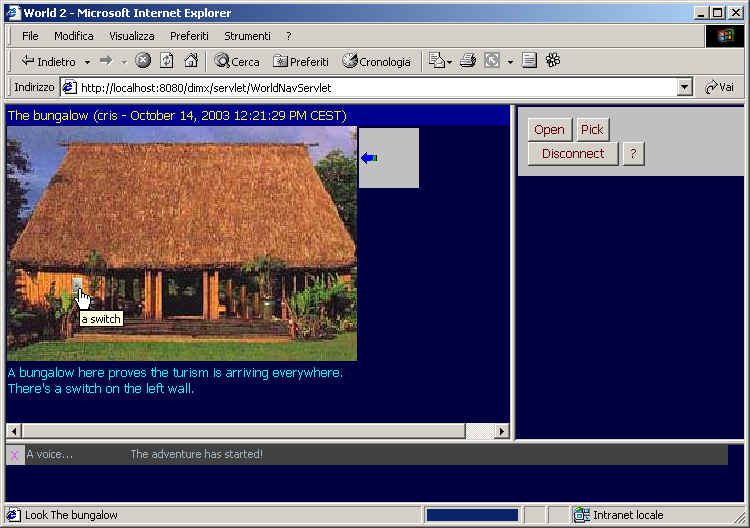
In World2 the standard panel named "chat" is loaded at the startup. You can't do much with it.
As soon as you arrive at the bungalow, you will notice there's a switch there. As soon as you USE the switch another "default" panel is loaded so that all players are able to play and finish the simple game, whose objective is to pick up an apple contained in a box located around. It is suggested that you have a test round in World2 so that you understand how it works.
In this tutorial, we will re-define the default commands panel so that the new commands (Roll the dice, attack, hit and magic formula) are available. For doing this, we will insert a GUI section, right after the WORLD opening tag, and a PANEL definition inside:
GUI

PANEL default
    BUTTON open
    BUTTON pick
    CR
    BUTTON logout
    BUTTON help

END_GUI
|
The above code re-defines the default panel, and reuses standard buttons allowing basic commands so that the game an be finished.
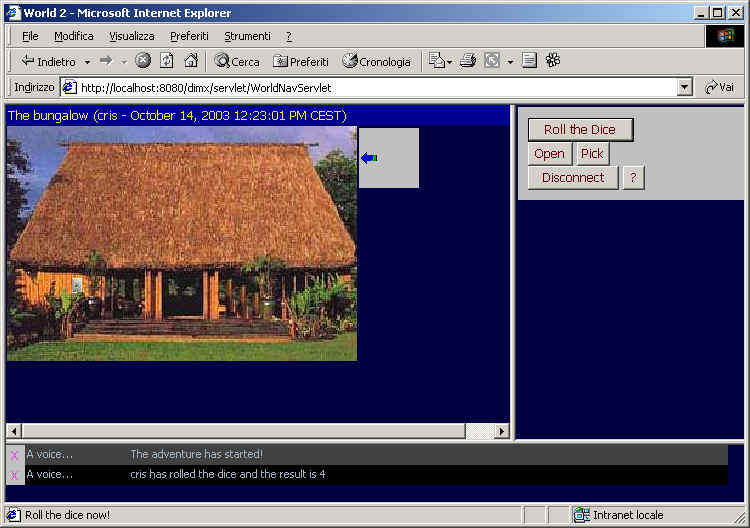
Save and verify. As soon as you activate the switch your test game will look like this:
You should still be able to finish the simple adventure with this, custom reduced panel. Now let's define the new commands.
Now let's fill the PANEL definition with BUTTONS so that the commands we need get realised.
this is the typical case of a command which needs no parameters. The definition of a custom button for it could be the following one, written in bold face:
PANEL default
    BUTTON roll, "Roll the Dice", "Roll the dice now!", onDiceRoll
    CR
    BUTTON open
    BUTTON pick
    CR
    BUTTON logout
    BUTTON help
We also added a CR tag, so that a carriage return is inserted.
After the BUTTON tag, we have a unique identifier (roll) which will be
used internally in the player's client. We are not very interested in it, but we
need to specify it so that the button can be distinguished and re-used in the
future.
Then, we have spcified the label on the buttons' surface ("Roll the
Dice"), then the toolbar tips text (nearly identical!), finally the
name of a custom event (onDiceRoll) which we will exploit in order to
detect when the button has been clicked. So, let's add the following EVENT in
the EVENTS section before the END_WORLD closing tag. You should just copy+paste
the part written in bold:
EVENTS
...
EVENT onDiceRoll
ACTIONS
    nr = rndInt(6)
    Broadcast $AGENT.name + " has rolled the dice and the result is " + nr

END_EVENTS
Please note that we inserted a carriage return (CR) in the PANEL definition in order to get a better layout.
Save and test. You are now able to roll the dice and all the connected players will be able to see the result of the dice roll.
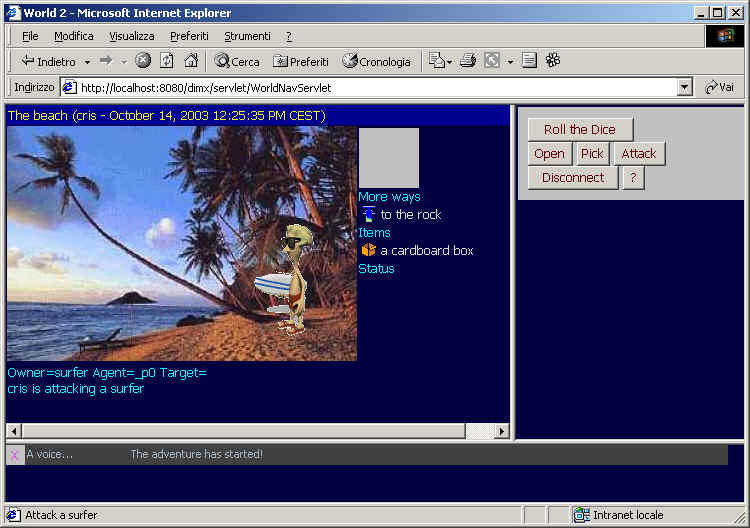
this is the typical case of a command which needs one parameter. The definition of a custom button for it could be the following one, just insert it somewhere inside the PANEL definition:
BUTTON attack, "Attack", "Attack ...", onAttack, O
The need for a parameter is expressed after the custom event ID (onAttack), by means of the code "O" (O stands for Object). Please note that the toolbar tip text has dots which will be automatically replaced by the actually selected object. The EVENT which could manage the user input could be the following:
EVENT onAttack
ACTIONS
    Display "Owner=" + $OWNER + " Agent=" + $AGENT + " Target=" + $TARGET
    Display $AGENT.name + " is attacking " + $OWNER.name
The code actually prints out the system variables and then a simple message telling who is attacking who. Then the code for a battle can be written your own.
Tip: If you need it, you may want to take the attack/battle code from the game "Underworld" and adapt it to your needs.
this is the typical case of a command which needs two parameter. The first object which is clicked represents the one to be cut. It will be the OWNER object of the specified event. The second object which is clicked represents the one to be used as a tool.
First of all we would rather add a tool which could be used to cut:
ITEM scissors
NAME scissors
DESCRIPTION A pair of scissors with sharp blades.
ICON icoScissors.gif
POSITION spiaggia
ATTRLIST pickable
IMAGE 100x73 scissors.gif
SHOW ICON
Now we have a nice scissors on the beach.
Next, the definition of a custom button for it could be the following one,
written in bold face:
BUTTON cut, "Cut with", "Cut ... with ...", onCut, OO
The need for two parameters is expressed after the custom event ID (onCut), by means of the code "OO" (OO stands for Object+Object). Please note that the toolbar tip text has dots which will be automatically replaced by the actually selected object.
Finally, we need an EVENT which could manage the user input.
The code could be the following:
EVENT onCut
ACTIONS
    Speak "Owner=" + $OWNER + " Agent=" + $AGENT + " Target=" + $TARGET
    If $OWNER=box And $TARGET=scissors
    	box.description = "This box is broken with a straight cut."
    	DropItems box
    Else
    	Display "Doesn't work!"
    End_If
The code actually prints out the system variables. Then it checks for the combination: scissors on box. If it matches, the box's description is altered and the items contained in the box are dropped to the ground. Any other combination of CUT command with other objects produces a "Doesn't work!" message.
Note: Please note that, in "OO" custom commands, the second object (the scissors) always is identified as $TARGET, even though in the real world the box is actually the target of the performed action. Don't be fooled by parameters names, the first line of code provided in this example should always be used to correctly figure out how parameters are dealt with.
There are cases in which you need a user-entered, text
parameter in addition to one game object.
This is the case of the "Magic formula" command: with this one, you
pronounce a magic formula which will be used on a game object and possibly
produce a result. The result is obviously dependent to the EVENT handling code.
First, let's define the command:
CR
TEXTBOX
BUTTON spell, "Magic to", "Cast formula ... on ...", onMagic, TO
CR
The CR are just to insert spacing. The TEXTBOX is necessary to let the user write the magic formula. Then, the button is nothing new when compared to the previous examples, except that it uses parameter model "TO" (TO stands for Text+Object) telling the client that the first parameter is actually taken from the textbox.
The handling EVENT code could be the following:
EVENT onMagic
ACTIONS
    Display "Owner=" + $OWNER + " Agent=" + $AGENT + " Target=" + $TARGET
    If $TARGET = "vanish"
    	Kill $OWNER
    Else
    	Display "Nothing happens."
    End_If

You will notice how the "vanish" magic formula will make any object to disappear, while "abracadabra" does nothing!
Note: Please note that, in "TO" custom commands, the parameters are automatically inverted, so that the specified object is always is identified by $OWNER, and the user-specified text is always contained in the $TARGET even though in the real world the surfer was actually the target of the performed action. Again, don't be fooled by parameters names, the first line of code provided in this example should always be used to correctly figure out how parameters are dealt with.
We will now replace the standard grey button we inserted at the end of the previous step, by replacing it with a custom, graphic button.
The button would be the following:
![]()
Right-click on it and choose "Save image as..." to save the image in your DimensioneX pics folder (you should be able to find it in your DimensioneX installation tree".
Now, here's how the BUTTON specification has to be changed: just add an IMAGE tag at the end.
BUTTON spell, "Magic to", "Cast magic formula ... on ...", onMagic, TO
    	IMAGE	64x20	btnspell.gif
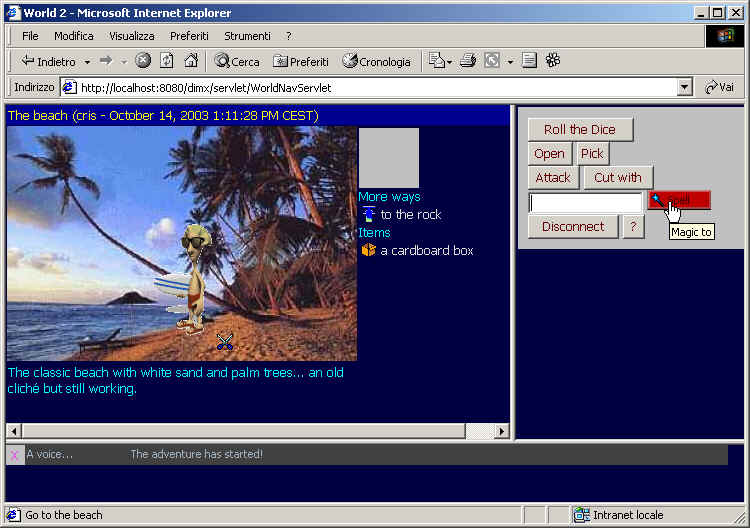
Easy! The text which was used to show on the button's surface is now used for balloon tips. All the rest is left unchanged.
For your custom buttons you can use any graphic file you like, as long as the browsers recognise it (JPG, GIF and PNG formats are okay).
This tutorial is over.
If you're in doubt, the complete source can be found here.
Feel free to contact us or post on the forums to give us some feedback or ask for more advice.