This tutorial will show you how I set up our multiplayer game hosting using DimensioneX on a cheap VPS.
Notes:
- A few aspects of the whole process are not explained into detail. If you feel that something needs more explanations, please reach out to us via a comment below, or via our facebook page (see sidebar).
- I explain here how to set up a multiplayer game server suitable for games built with/for the DimensioneX game engine (this site is about this!) it might be also a tutorial on how to install Tomcat on a VPS but for sure it will not help you if need to run other type of games.
Ready? Let’s go!
1. Get a VPS
I chose a Virtual Private Server (VPS) from OVH because it is cheap, reliable and easy to set up. Their VPS SSD offer currently starts from 2,99 EUR per month (Europe, offers for US might differ). I got this one and then chose to install Ubuntu 16.04 Server 64 bit as operating system. After a few minutes we have been e-mailed the IP and root password to log in via SSH, which can be done easily with the PuttY utility (free download)
About OS version, please note: I have tried before all with Ubuntu 18.04 with no success. I might have made mistakes, but I can only guarantee the below described procedure (with paths) works on this OS with that specific version. If you decide to try another, you can try adapting instructions, but you’re on your own.
2 Install Tomcat 7
Once connected via ssh, type commands:
sudo apt-get update
sudo apt-get install tomcat7
service tomcat7 start
You should get no errors.
Then with a browser, open your IP (we assume 123.123.123.123 but use your own)
http://123.123.123.123:8080/
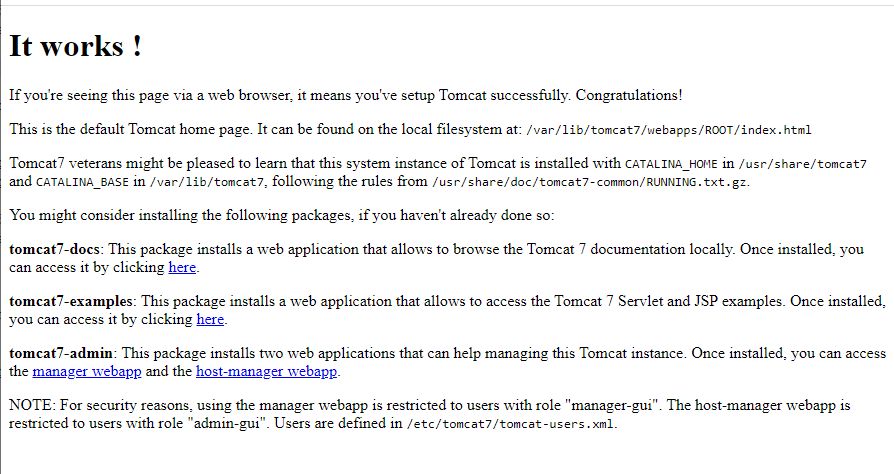 You should see this:
Tomcat works.
Please note that web content is located: web content is
/var/lib/tomcat7/webapps/ROOT
and that logs can be checked at:
/var/log/tomcat7
By looking at the logs you will see that Tomcat is using JDK Java 1.8.* which should be fine.
From this point onwards, I recommend you perform most of the tasks using an FTP client such as FileZilla, using the SFTP-SSH connection method, and IP/credentials you used for SSH.
Now let’s install the game server with samples.
3. Install DimensioneX
From our Download page you will get the “Deployable WAR Archive” version, which is the minimal one. You will get a ZIP, you unzip it and get a .WAR file. That’s it.
Shell again:
service tomcat7 stop
Now clear logs in /var/log/tomcat7 so that at next restart you can easily see if something got wrong.
Upload dimx.war to /var/lib/tomcat7/webapps/
service tomcat7 start
Then we check with a browser if the thing is up and running:
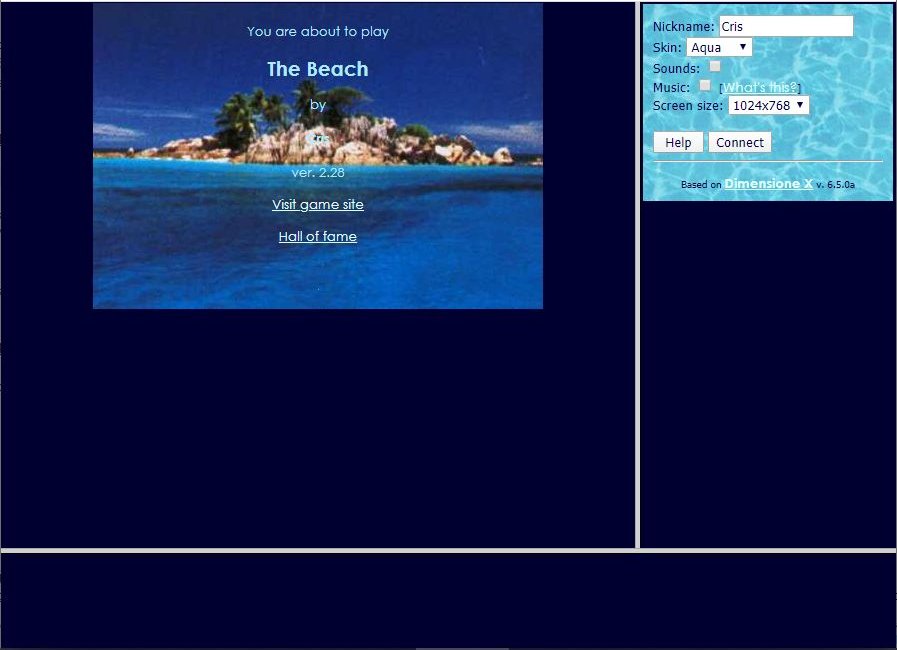 http://123.123.123.123:8080/dimx/servlet/multiplayer
You should see this:
woo-hoo it’s working!
If not, check logs and fix.
We want to take a step further, removing that ugly :8080
4. Changing tomcat port to 80
Port 80 is the web default. We need to install authbind to do this.
service tomcat7 stop
apt-get install authbind
Then, with a text editor we open /etc/default/tomcat7 and set
AUTHBIND=yes
at the end of the file.
cd /etc/tomcat7
cp server.xml server.xml.works
now we have a backup copy of the last working config (do this everytime you make a change!)
Then we edit /etc/tomcat7/server.xml and we search/replace every occurrence of 8080 with a simple 80
save file, then
service tomcat7 start
Finally try with the browser:
http://123.123.123.123/dimx/servlet/multiplayer
Does it work opening “The Beach”? That’s good.
Only if not, here are some (untested) commans to try out. I did not use them but I found them around:
service tomcat7 stop
sudo touch /etc/authbind/byport/80
sudo chmod 500 /etc/authbind/byport/80
sudo chown tomcat7 /etc/authbind/byport/80
service tomcat7 start
You might want to replace that ugly IP number with a nice domain name such as www.yourdomain.com
5. Setting up DNS mapping
Here your domain provider will help you setting up the correct mapping:
www.yourdomain.com points to 123.123.123.123 (your IP used above)
Typically this is done by adding an “A” record to your DNS.
When done, before trying it out (please remember that DNS needs time to propagate – from few mins to 48 hours!) you go back to your shell and
service tomcat7 stop

cd /etc/tomcat7
cp server.xml server.xml.works2
Then edit /etc/tomcat7/server.xml and we search/replace every occurrence of localhost with www.yourdomain.com
save file, then
service tomcat7 start
Then try with the browser (recommended! Chrome WILL try now to go under https and I cannot force it to use normal http so my recommendation is to use another, I used Opera Portable and worked perfectly):
http://www.yourdomain.com/dimx/servlet/multiplayer
Does it still open The Beach?
Wonderful. Now the last step.
6. Adding SSL/HTTPS to Tomcat
Before proceeding, let’s make a backup of working config:
cd /etc/tomcat7
cp server.xml server.xml.works3
and stop Tomcat (VERY important – if you forget next step will fail)
service tomcat7 stop
Let’s install Certbot for free SSL certificates:
sudo apt-get install software-properties-common
sudo add-apt-repository ppa:certbot/certbot
sudo apt-get update
sudo apt-get install certbot
First we create a keystore. Change “www.yordomain.com” and “chonsenpass”
cd /etc/tomcat7/
keytool -genkey -alias www.yourdomain.com -keyalg RSA -keypass chosenpass -storepass chosenpass -keystore /etc/tomcat7/keystore.jks -keysize 2048
You will get a series of questions like these. Answer to first questions with your sites’ domain name! Adapt others (location is unimportant)
What is your first and last name?
  [www.yourdomain.com]: www.yourdomain.com
What is the name of your organizational unit?
  [www.yourdomain.com]:  www.yourdomain.com
What is the name of your organization?
  [www.yourdomain.com]:  www.yourdomain.com
What is the name of your City or Locality?
  [Bologna]: Bologna
What is the name of your State or Province?
  [Blogna]:  Bologna
What is the two-letter country code for this unit?
  [IT]:  IT
Is CN=www.yourdomain.com, OU=www.yourdomain.com, O=www.yourdomain.com, L=Bologna, ST=Bologna, C=IT correct?
yes

Enter key password for <www.yourdomain.com>
        (RETURN if same as keystore password): <-return here!
We now generate a certificate request (Let’s Encrypt will sign this later):
keytool -certreq -alias www.yourdomain.com -file request.csr -keystore /etc/tomcat7/keystore.jks
We now need Lets’s Encrypt to sign this and generate the certificate.
Please verify that tomcat is not running and that you don’t have other webservers running on port 80.
/usr/bin/certbot certonly --no-self-upgrade --csr request.csr -d www.yourdomain.com
When certbot asks you, choose “1 . spin a temporary webserver…”
Now we import the generated & signed certificate (in my case it was 0001_chain.pem) in the keystore
keytool -import -trustcacerts -alias www.yourdomain.com -file 0001_chain.pem -keystore /etc/tomcat7/keystore.jks

And finally, let Tomcat know about the certificate and activate the SSL server on port 443. So we edit for the last time:
/etc/tomcat7/server.xml
You have to uncomment a part (see picture aside for the original) and edit it so that it looks like the one below (with adaptations of your chosenpass and domain):
    <Connector port="443" protocol="org.apache.coyote.http11.Http11Protocol"
               maxThreads="150" SSLEnabled="true" scheme="https" secure="true"
keystoreFile="/var/lib/tomcat7/conf/keystore.jks"
         keystorePass="chosenpass"
         keyAlias="www.yourdomain.com"
               clientAuth="false" sslProtocol="TLS" />
Save and start Tomcat 7.
Finally open with your browser at (notice the final S of https):
https://www.yourdomain.com/dimx/servlet/multiplayer
…and you’re up and running under https.
Please leave a comment if you like