Once you have collected the graphics for your tutorial game, it’s time to learn some basic coding. So open your favourite text editor such as Window’s Notepad.
We recommend using Notepad++ or Textpad or PSpad instead of Windows Notepad. These utilities are small, free to use, and much more better than Windows Notepad.
Copy and paste this text below in the text editor. Soon we will understand what this text means.
|
WORLD NAME Testland IMAGESFOLDER /dimx/testland/ AUTHOR Your Name
‘ ***** This is a comment ROOMS
ROOM park DEFAULT NAME The park DESCRIPTION A beautiful park stands before my eyes. IMAGE scnLunetta1.jpg
ROOM bungalow NAME Bungalow front IMAGE scnBungalow.jpg
ROOM bedroom NAME Bungalow’s room IMAGE scnBungalowStanza.jpg
END_ROOMS
END_WORLD |
Now save this file inside your DimensioneX WEB-INF/ system folder (remember step 1) and name it testland.dxw. The extension is not actually very important (it can be also .txt or whatever) until you remember the name you have actually given to your game file when you will configure for testing at the bottom of this page.
Understanding the basics of the game definition
Games running on DimensioneX are written using the DXW format. DXW is actually a text format but the syntax has been specially defined for designing games. The keywords WORLD, ROOM etc. are completely explained in the Developer’s Reference – you should have this document at hand.
Here you just need to understand a few things.
- The first part (WORLD) tells you that what lays in between is the definition of a world (typically a game)
- The values after the WORLD tags NAME, and AUTHOR can be changed as you like (write your name there)
- The value for the IMAGESFOLDER is very important as it tells the game engine where the game graphics is. A wrong value here will result in images not being displayed during the game.
- Any comments can be inserted in the text after the symbol ‘
- The section ROOMS … END_ROOMS defines the rooms of the game.
- Each ROOM definition defines a room. Please note we have indicated the images names here, and they need to be correct. The NAME of each room can be changed.
- More information can be found on the Developer’s Reference.
Remember: While editing a game file, please note the spacing is optional, that is, it doesn’t matter how much spaces or tabs you put in the text. Please note also that the positioning of carriage returns DOES matter, so don’t merge lines!
Testing it
Now it’s time for a test run. Only once, you need to edit the DimensioneX configuration file worldnav1.properties, you will find it in your DimensioneX system folder, and modify the worldFile setting as shown below, so this tutorial game is loaded at startup:
| worldFile=testland.dxw |
If your game file is different (i.e. has .txt extension then specify it)
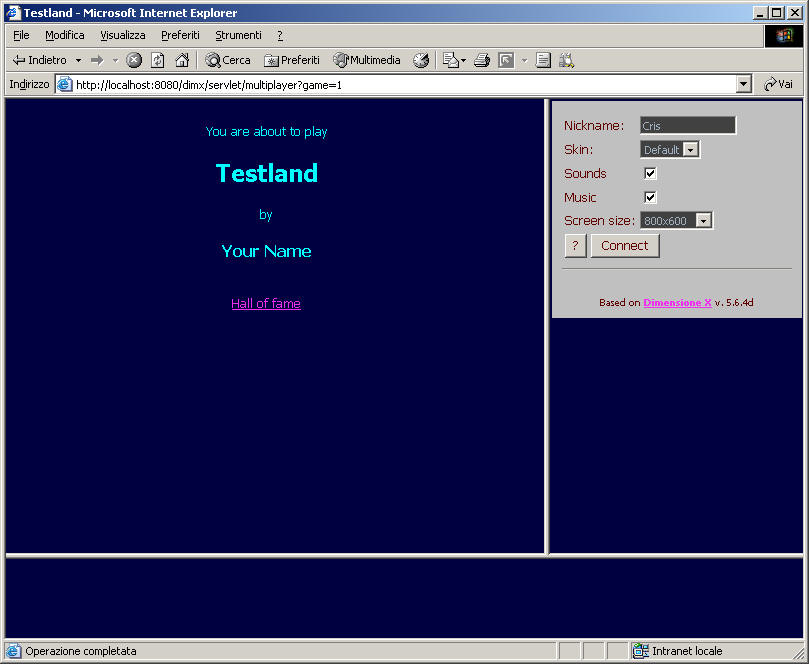
Now stop and restart the web server (If you tried the sample game The Beach you already know how to do this) and open your browser. You now can connect the game by means of the following URL:
http://localhost:8080/dimx/servlet/multiplayer?game=1
Your browser should show the following (if not, see troubleshooting at the bottom of this page):
Tip: Add this page in your browser’s favorites or – even better – in the links bar. This will save you time when developing.
Now enter a nickname and click Connect. You will enter the game and unfortunately can do very little more, as the system does not know how the rooms are interconnected.
If it worked until here, let’s proceed with the next step.

If not, then read the section below.
Troubleshooting this step
If an error message appears over a white background, then it means that DimensioneX could not load the game, hence the game won’t start.
| Problem | Solution |
| The game engine always loads “The beach” and not “Testland” |
|
| Once connected to testland you can’t see the images | Either you stored your game images in the wrong folder, or the IMAGESFOLDER setting in your game file is wrong.
|
| The game file cannot be found |
|
| The game won’t load because of errors | Check carefully your testland.dxw file: Did you misspelled a tag? Are there any keywords missing? |
| Other |
|
If you cannot overcome the difficulty, then go to our Support section and ask for help.
When ready, let’s proceed with the next step.