![]()

|
|
|
|
Implementing fights and battlesKB Article n. 023 AbstractThis article explains how to implement a fight/battle algorhithm in your own game while using the DimensioneX game engine. As the last step, we show how to generate random monsters dynamically. Our example
It is strongly advised that you play Underworld
at least once so that you understand how fights will look like. Target behaviourBasically, we will have two types of attacks: - Physical attacks (with weapons, bare hands). They are mainly related to player's Strength. - Magical attacks (with spells). They are mainly related to player's Experience. At the end of each attack the fighters situation is updated and each one can decide whether to attack the other or run away. If the Health parameter lowers at zero or less, the fight can be considered as over, and the winner might be awarded some bonus points. If the loser has died, the winner will be credited with some bonus either in the Strength or in the Experience parameter, depending on the used attack's type (physical/magical). Important notesNote #1The algorhitm presented here is just an example, even though it is a valuable one. After following this example you might want to change things so that they suit your own game plot. Please, first implement this example as it is, then - when you saw it worked - you can change things. If you start changing the code before you see it working and an error occurs, then you won't be able to tell if it was because of the code presented in this article, or because of your own changes. While developing, you should always move from a working game code to another working game code, so that you can quickly restore the old code as soon as an unexpected behaviour shows up. Note #2Before starting, make sure you have a game source on which to apply these techniques we are going to illustrate. If you don't have a game source at hand, then use our demo name Testland. If you never took our basic tutorial yet, it is advised you do so now, for acquiring basic knowledge about the DimensioneX engine. Experienced users can skip the basic tutorial and download the game file here for putting in practice the steps presented this article.The game source file is testland.dxw. In fact, this tutorial's sample screens are in fact based on Testland. As mentioned before, you can of course apply the steps to your own game. In certain case you might have to adapt scripts or instructions. Note #The source code quoted in this page is not intended for printing, but just for copy+pasting in your game project. If you wish to print the source code and read it comfortably, then please copy+paste it into any text editor, and then print it by using the text editor's Print function. Note #4Please always apply to our Support section if you have doubts or if you need help. Don't be afraid to ask. Step 1 - assumptions and base propertiesFirst of all you have to ensure that all the characters in the game have the following properties:
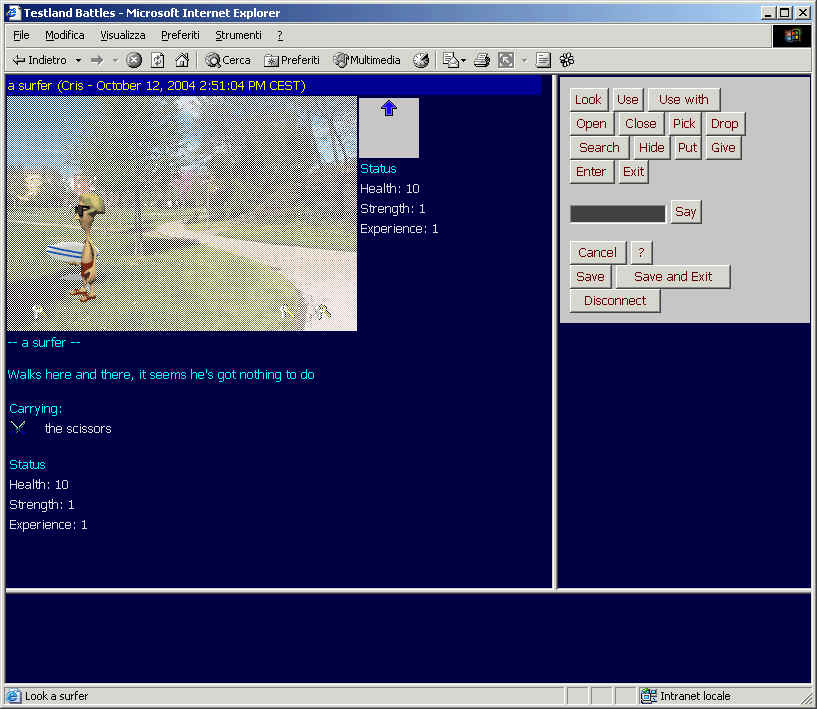
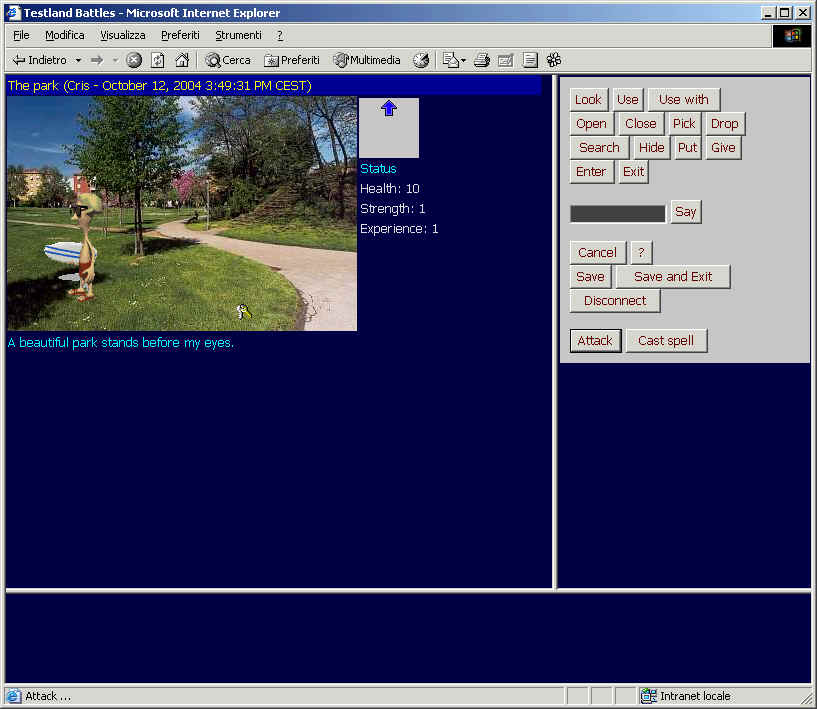
The best way to set a default value for all these parameters to all the game characters, is to specify it after the CHARACTERS section tag, like this: Please note that properties starting with capital letters (Health, Strength, Experience) will be visible to the player in the game panel, the others (attackable, type) will not. Now we will apply this change to our game file. When running it, by looking at any character, we will see he's got the above-defined properties: This is what you get (click to enlarge): Now we enter in the battle algorithm core principles. Step 2 - add the Attack commandThe Attack command is not part of the standard command panel in DimensioneX. Nor the Cast Spell command is. We could create two custom command panels for the two player types warrior/magician (there is a tutorial about how to do create player customisation) but we don't want to do it now as this will take time and effort we can spend later. So we will now adopt this shortcut: we will enhance the default commands panel so that all players can do both things. The default commands panel can be easily enhanced by adding the following code written in bold inside the GUI section of your game (if your game source does not have a GUI section at all, then copy-paste all the code below, before the ROOMS section: This is what you get (click to enlarge): Now we can issue the Attack command when playing, but it will just produce a runtime error message. This is normal, because we still need to include the code instructing the game engine about how to manage attacks. The code, according to what we wrote in the PANEL definition, needs to include the routines named: onAttack and onCastSpell. These will be included right after reasoning on the battle agorhithm presented in the next section. The battle algorithmIn this section we explore the rules governing the fights in the ystem we are going to implement. First of all we have set certain rules. You can agree or not with them, however this was our decision. You can later change them and make the algorhithm reflect your own decisions:
Hits formulaDuring each fight, the following gives a measure of the hits that the attacker has made to the victim: hits = (difference in strength)*WeightOfStrength + (difference in Experience)*WeightOfExperience + Randomness + (difference in Health)* 30% Now, the weights of Experience and Strength might be either 100% or 50% depending on the attack type, as mentioned above. If the hits are a small number, the fight is a draw, or probably the victim has dodged or shielded the hit. If the hits are a significant positive number, the attacker has won. If the hits are a significant negative number, the attacked has received damage from its own hits (the opponent was probably able to defend himself). the victim's Health is decreased proportionally to the received hits. Increase formulaWe have mentioned that by winning a fight, the winner gets an increase. The following formula gives a measure of this increasing. overallDifference = (loser.Strength + loser.Experience)
- (winner.Strength + winner.Experience) That is, the more the opponent is strong, the more the winner gets. No bonus for victory on weaker opponents. In the next steps, we will see how these rules can be translated into working scripts. Step 3 - including the codeIn order to manage attacks and spells, we need to include the following functions (also said EVENTS):
The code follows. Please be sure to select and copy all the text by dragging the mouse downwards:
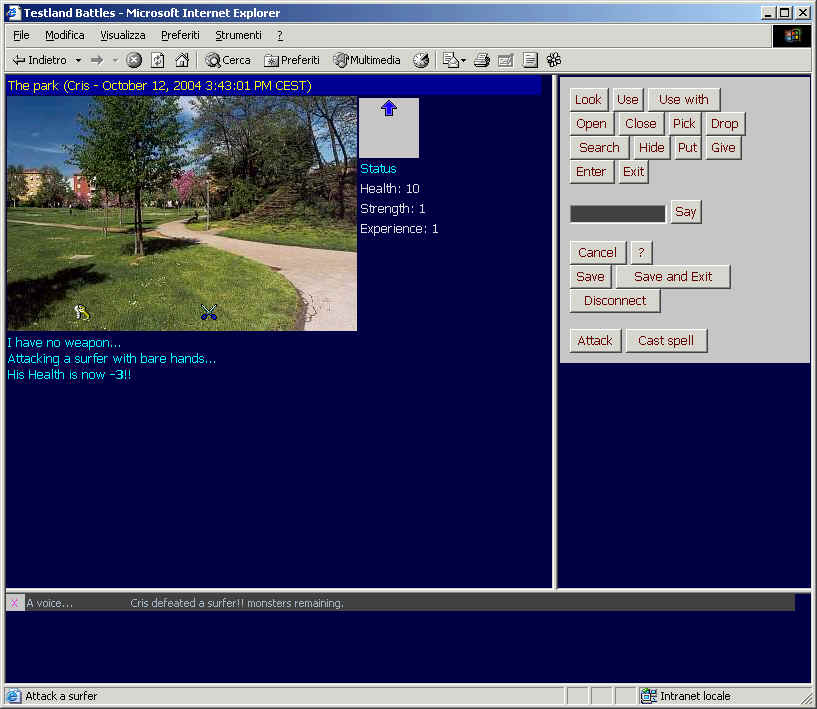
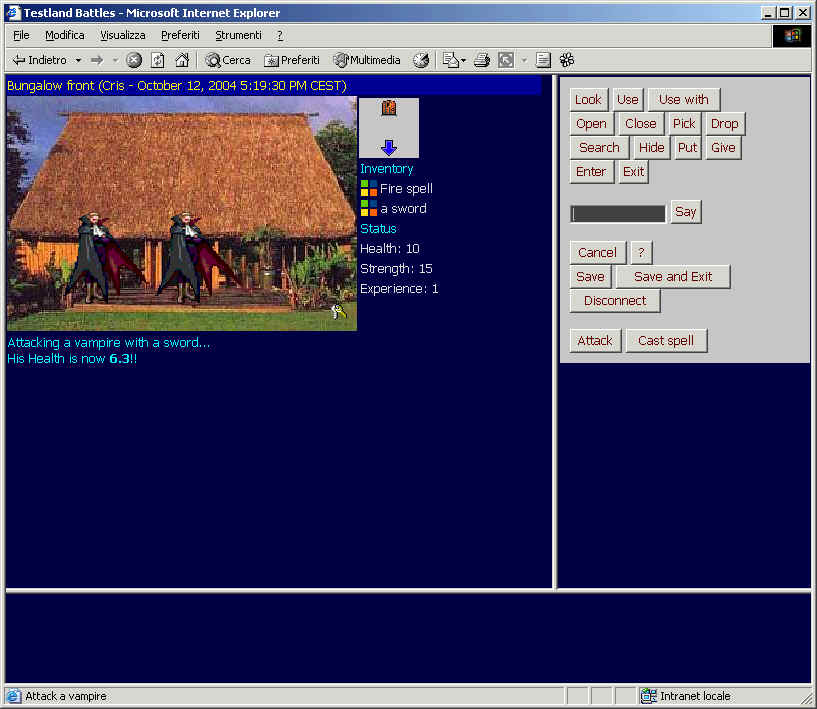
Paste the scripts in the EVENTS section of your game. You will notice that many comments in the code above explain how the subroutines work. However we will now look at each function and comment it briefly. LivingAt each game's tick, that is, every 30 seconds, this function is automatically called upon each character. Here, we improve Health of 0.2 points. Health is however limited to 10 units. Finally we return 1 (true) or 0 (false) upon the value of Health to decide if the characted should continue to live or not. onAttackThis one simply defines who is the attacker and who is the victim, then calls doAttack to continue. See explanations about the DimensioneX Event model in the Programmer's Reference for more information. onCastSpellThis one is similar to onAttack but works on spells. Currently it is designed to work on two spell objects, which will be added later. They will be called windspell and firespell. Whatever else is not considered as a spell and therefore will not work. The procedure calls directly subFight to continue (see below). doAttackThis is actually a procedure taking two inputs passed as global variables: attacker and victim. First of all we check whether the victim is attackable. If not, we exit with a message. Secondly, we check if a monster (type >= 10) is attacking another monster. If this is so, we want to avoid it. Finally, we try to identify the weapon which will be used for the attack. then we call subFight to continue. subFightThis implements the battle algorhitm as presented above in the battle algorhitm secion. At the end, we call battleResult to perform necessary actions to update the fighters' own situation. battleResultThis implements the winner's increase policy we presented above in the battle algorhitm secion. Please note that when a monster is killed (we do not have monsters in our game yet) a procedure named createRndMonster is called so that another random monster pops up to make the games continue. This procedure will be presented later. You should test your game now. You will notice that you can fight, win and kill opponents or be killed. This is something similar to what you should get (click to
enlarge): Now we still miss a few things. First one is:
Let's fix it now. Step 4 - Adding the spellsNow we add two spell items in the ITEMS section of the game: Please note that each spell is pickable (so you can pick it up) and has got a Power property determining its attack power (number starting from 1 to up). For simplicity we specified no icon here, so the default item icon will be used for display. If you want you can use any icon you like via the ICON tag.
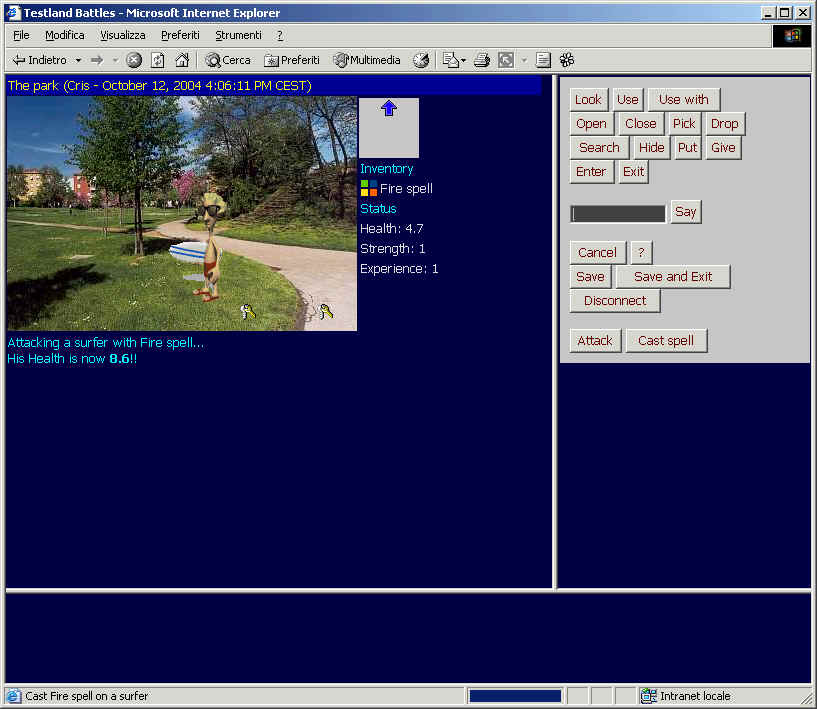
Now save and test. You should be able now to cast spells and so to launch magical attacks. Note: For the spells you will want to add, please always use identifiers containing the word "spell" (eg. windspell, spellearth, spell3 etc.) otherwise they will be reckonised as weapons. This is what you get (click to enlarge): Now we still miss a few things. Next one is:
Let's fix it now. Step 5 - Adding the weaponsNow we add two weapons in the ITEMS section of the game: Please note that each weapon is pickable (so you can pick it up) and has got a Power property determining its attack power (number starting from 1 to up). For simplicity we specified no icon here, so the default item icon will be used for display. If you want you can use any icon you like via the ICON tag.
Before testing, we need also to add code so that whenever a weapon is picked up, it is automatically set as the player's default weapon. Therefore we will now add the following code to the EVENTS section:
Now save and test. You should be able now to pick up weapons and see they are being used in physical attacks. This is what you get (click to enlarge): Now we still miss one thing:
We will now introduce a special subroutine to create monsters dynamically. Step 6 - Dynamic monsters!In order to manage dynamic monsters, we are now about to introduce some new variables. The choice of these variables is closely related to the plot of the game from which we borrowed the code, Underworld. The game progresses with monsters appearing at random and in roughly increasing power. So, let's say that here our desired behaviour will be the following:
Please note that after completing this tutorial, you should be able to add an arbitrary number of monsters to this system, provided you have an image to show them on the screen. We will now introduce the following, new global variables:
Here you have a brief explanation of the functions we are about to add.
The code follows (just copy+paste in the EVENTS section of your game):
Here follows a brief explanation on the script code. Please also proofread the code for learning from comments. createRndMonsterThis procedure calls the createMonster procedure but first decides which monster type to pop up, depending on the killed monsters. This is done by the first formula about the variable named killratio. In brief, it is possible to identify a monster type (currtype) which corresponds perfectly to the current killratio. Then, it is possible to add some randomness around this value which is later normalized and kept in the variable seltype. createMonsterThis procedure pops up a monster at a random room. The monster type must be specified via the global variable seltype, which must be in the range 1..mtypes. A note for advanced programmers: You can add more monster types and in the case you simply add more "If seltype =" clauses to the list. In that case, be sure to have put the monster image in the images folder of your game, and to have specified the correct width and height dimensions in the NewImage statement. See the Developer's Reference if in doubt. onStartThis one just initalizes the necessary global variables. This one is called by the game engine automatically at startup.
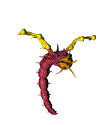
Important! Please add the referenced images "werewolf.gif",
"worm.gif" and "vampire.gif" (see below) to your own game
pictures folder Questions you might ask now:Which is the game pictures folder? The one you specified in the game source, at the beginning, WORLD.IMAGEDIR tag. In our case the folder is on my computer, under the tomcat/webapps/dimx tree, the folder is named testland. How do I grab these nice monster images? Now save your game and test it. You now should be able to see, fight and kill monsters. Please note that even after you killed the fifth monster, the game will continue. You can now add code to manage this event in the battleResult EVENT code. You should have got something like this (click to enlarge): SummaryIn this tutorial we showed how to take a standard adventure game (such our tutorial game testland) and add elements to turn it into a battle arena with different weapons, spells and player types. The important here is that you understood that:
Here, you can download the finished battles testland game. Next stepsIn the demo game Underworld you will find even more elements, it includes armours, but even sounds, animations, healing potions, and special cases for a number of monster types. Visit Underworld's site, download and study the source, experiment with it and finally apply the techniques to your own games. Your comments, please!We are looking forward to read from you in our forum. |
 The technique illustrated here was used for
the demo game
The technique illustrated here was used for
the demo game